
NCR Voyix Counterpoint Layaway Training Guide: Mastering Customer Layaway Services
Counterpoint Layaway Tips & Tricks
Learn how to easily use NCR Voyix Counterpoint’s layaway tools to boost customer satisfaction and keep your inventory running smoothly with this step-by-step guide.
A layaway allows customers to reserve merchandise by making a deposit, then pay the remaining balance over time before taking possession of the items. In Counterpoint, layaways are fully integrated into your regular point-of-sale operations, meaning you can process them using the same Ticket Entry and Touchscreen Ticket Entry interfaces you already know.
Key Concept: Layaways work exactly like orders in Counterpoint, with the main difference being the line type you select when creating the transaction.
Why use Layaways?
Layaway programs aren’t just a helpful option for customers, they’re an awesome strategy to consider for your business. They can help:
- Boost Sales: Give customers the confidence to commit to larger purchases by paying over time
- Build Loyalty: Show customers you’re flexible and willing to meet their needs
- Improve Inventory Planning: Layaway helps you predict demand and manage stock more efficiently
- Reduce Returns: Because items are paid off gradually, customers are less likely to return them
- Stay Competitive: Offering multiple payment options makes you stand out from retailers that only offer full payment upfront
Layaways makes it easier for customers to say “yes," the best word to hear as a business.
Step-by-Step: Creating a New Layaway
Follow these steps to create a layaway for a customer:
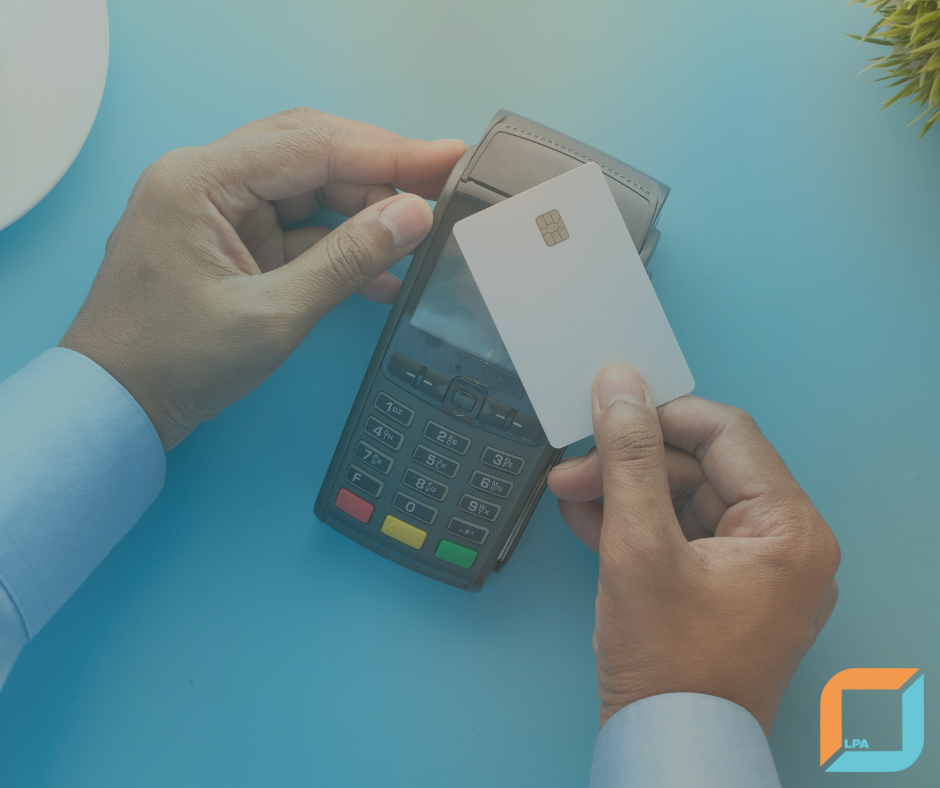
- Start the Layaway Transaction
- Open Ticket Entry or Touchscreen Ticket Entry
- Click the Layaway line type button
- OR select
Layaway from the
More button menu
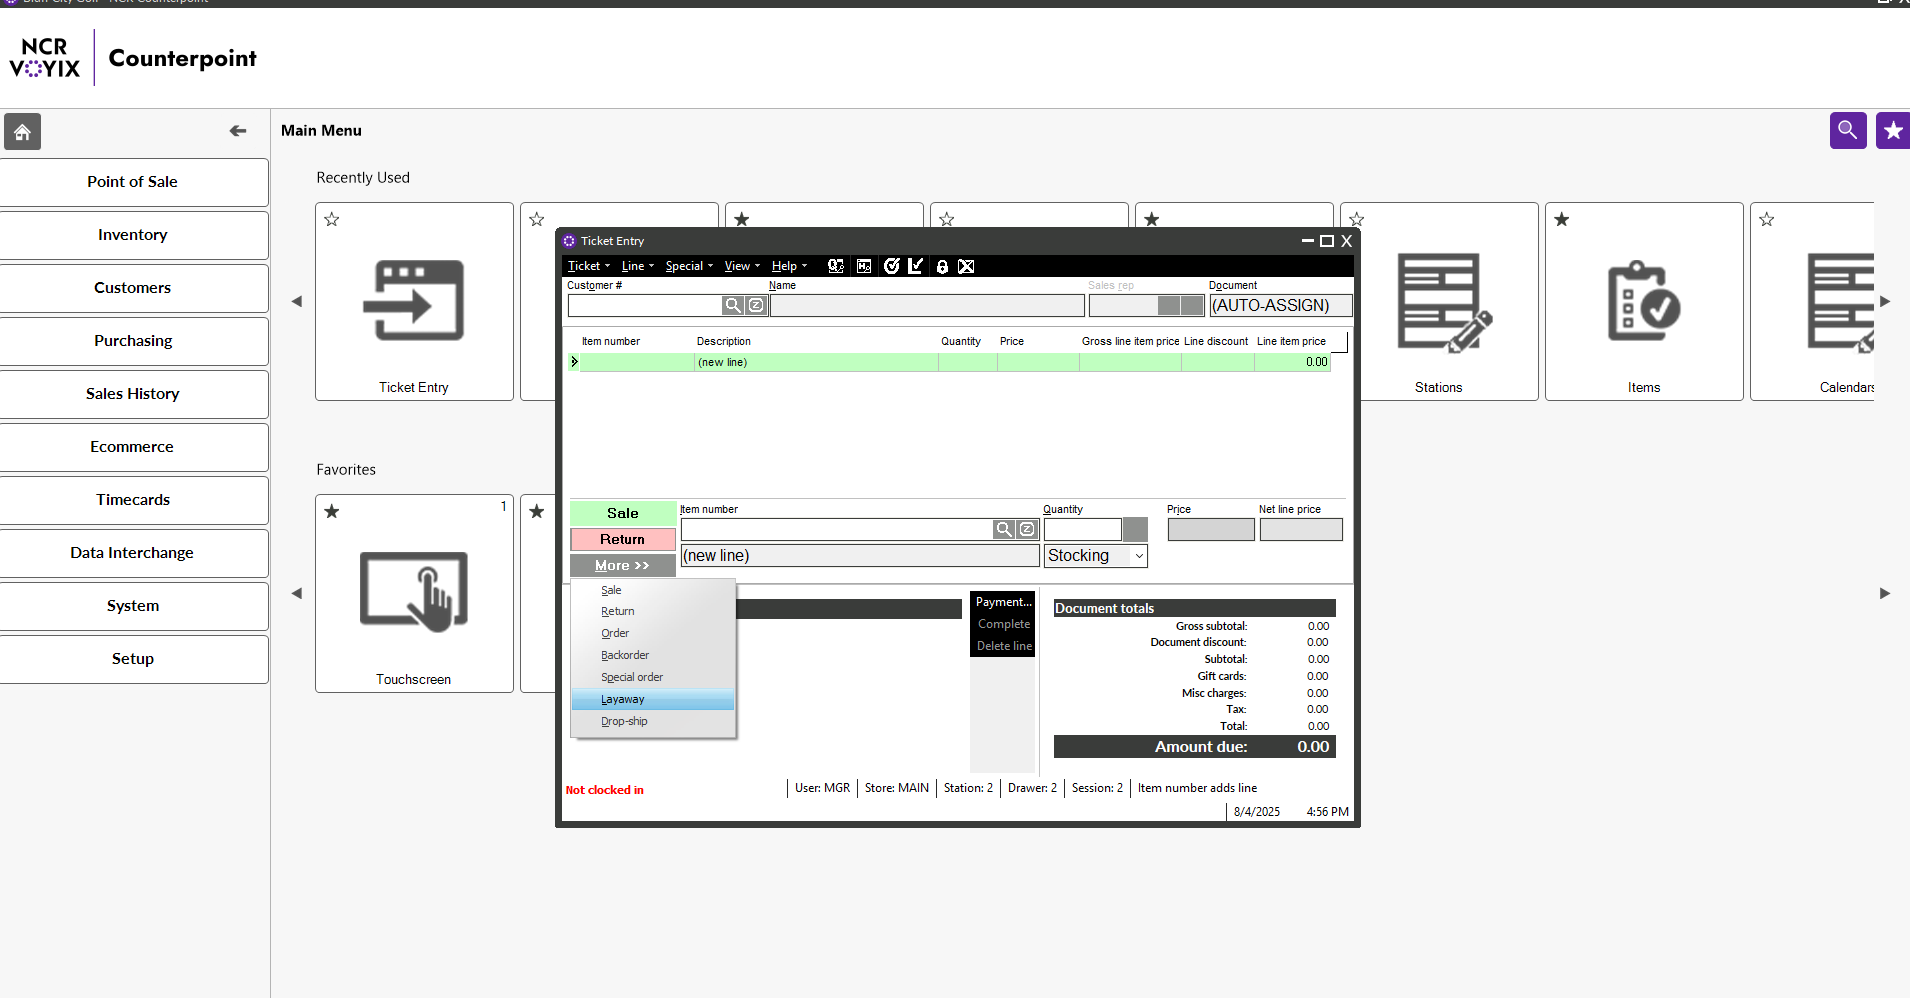
2. Add Items to the Layaway
- Enter a line for each item the customer wants to place on layaway
- Specify quantities just as you would for a regular sale
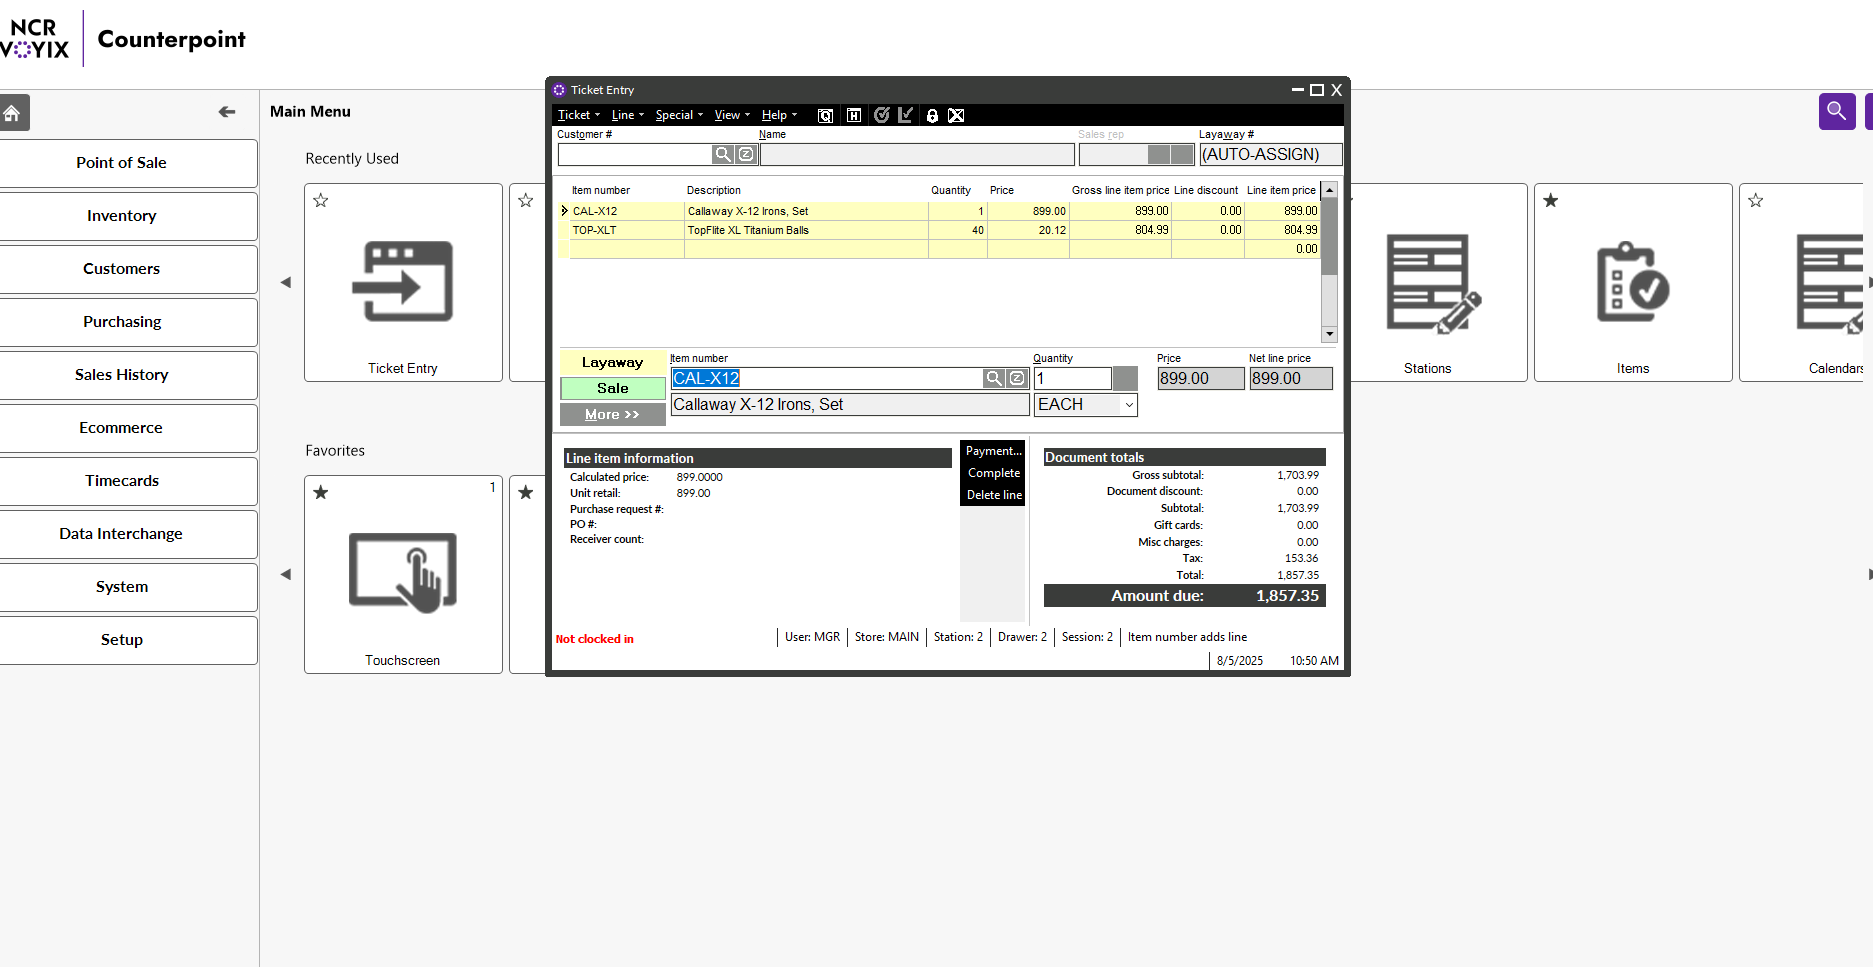
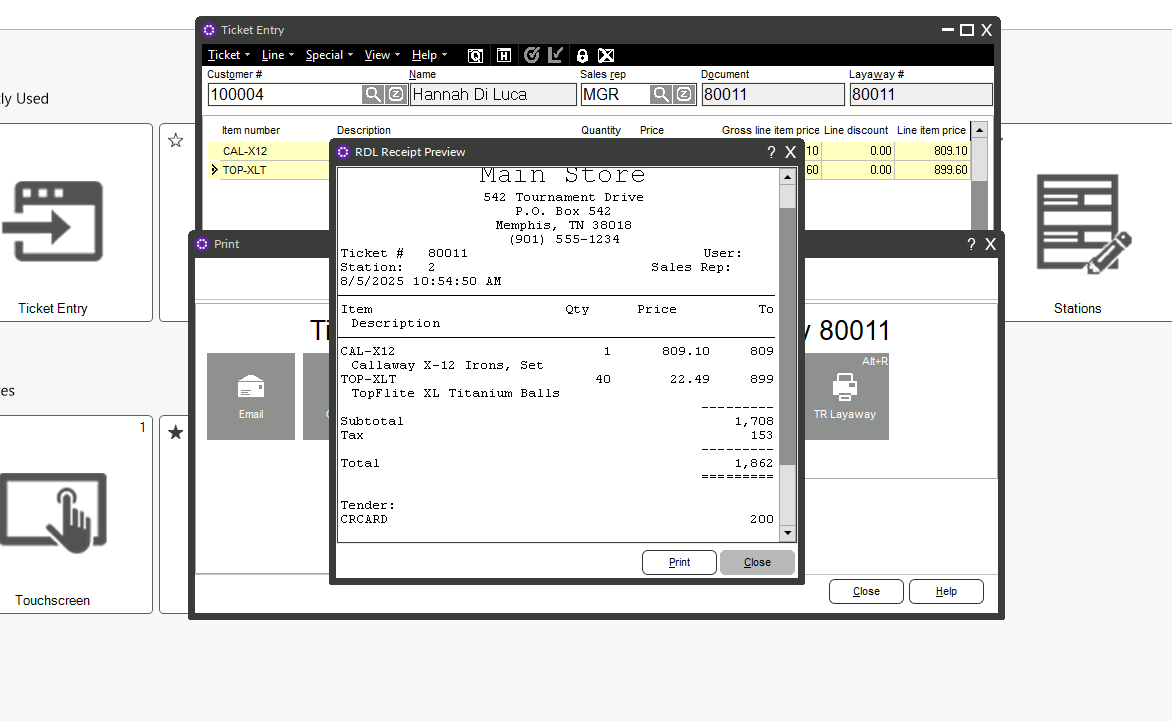
3. Process the Initial Payment
- Use the Payment Entry window to enter the customer's initial deposit
- Remember: You can accept multiple tender types (cash, credit cards, etc.)
- Follow your store's deposit policy requirements
4. Complete the Transaction
- Complete the layaway transaction just like you would complete a new order
- The system will automatically commit inventory quantities and update your "qty on layaway" values
Managing Existing Layaways
Accessing the Process Layaways Dialog
- Click the layaway button on the Ticket Entry toolbar
- This opens the Process Layaways dialog with the same functionality as the Process Orders dialog

Available Layaway Management Functions
Taking Additional Payments:
- Click Deposits to accept payments toward the layaway balance
- You can process partial payments over time until the layaway is paid in full
Printing Documents:
- Click Print to generate a copy of the layaway for the customer
- Click Pick to print a picking ticket when preparing items for release
Making Changes:
- Click Edit to modify layaway details (quantities, items, etc.)
- Only users with proper security permissions can edit layaways
Releasing Layaways:
- Click Release when the customer is ready to take possession
- You can release the entire layaway OR specify partial quantities to release
- Released items convert to a regular sale ticket that you complete normally
Cancellation and Reinstatement:
- Click Cancel to cancel a layaway (requires proper permissions)
- Click Reinstate to restore a cancelled layaway if the customer changes their mind
Tracking History:
- Click View History to see complete activity records for any layaway
- This shows original entry, modifications, payments, and releases
Important Inventory Considerations
When you create a layaway, Counterpoint automatically:
- Reduces "Qty Available" for the layaway items (preventing overselling)
- Increases "Qty on Layaway" values to track reserved inventory
- Maintains these quantities until the layaway is released or cancelled
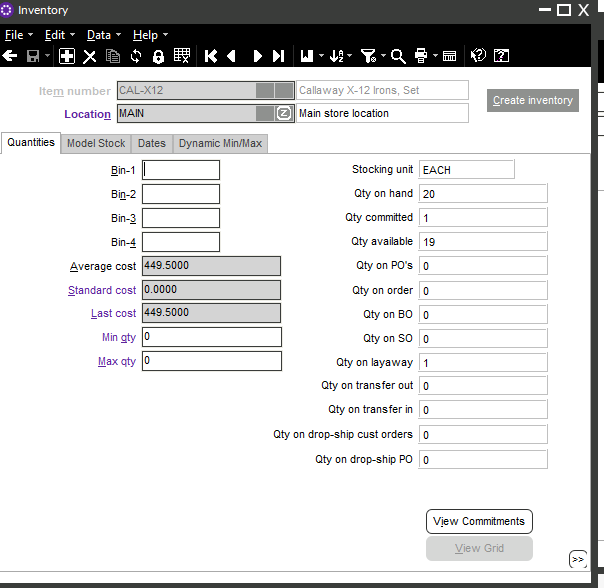
This ensures accurate inventory tracking and prevents you from accidentally selling items that are already reserved for layaway customers.
Security and Permissions Training
Your ability to perform layaway functions depends on your assigned security code. Here's what different permission levels allow:
Basic Layaway Permissions:
- Allow layaway lines: Create new layaways
- Enter layaway deposits: Process payments on existing layaways
- Print layaways: Generate layaway receipts
Advanced Layaway Permissions:
- Edit layaways: Modify existing layaway details
- Release layaways: Convert layaways to sales
- Cancel/Reinstate layaways: Manage layaway status
- Pick layaways: Print picking tickets
- View layaway history: Access complete activity records
Important: If you can't perform a specific layaway function, check with your manager about your security permissions.

Working in Offline Mode
If your store uses the Offline Ticket Entry Option, you may be able to process layaways even when the main system is unavailable, depending on your store's configuration:
- Creating new layaways offline: Possible if enabled by management
- Processing existing layaways offline: May be available for deposits and basic functions
- Automatic numbering: System prevents duplicate layaway numbers across workstations
Customer-Specific Layaway Settings
Some customers may have special layaway restrictions or permissions:
- "No layaways" flag: Some customers may be restricted from using layaways
- Override permissions: Authorized users can override customer restrictions when appropriate
- Layaway history: Previous layaway activity is tracked in customer records
Best Practices for Layaway Success
During Layaway Creation:
- Clearly explain your store's layaway policy to customers
- Ensure the initial deposit meets store requirements
- Provide the customer with a receipt showing layaway details
- Verify customer contact information for future communications
During Layaway Management:
- Regularly follow up with customers on open layaways
- Process payments promptly and provide updated receipts
- Keep layaway items properly organized and identified in storage
- Monitor layaway aging reports to identify stale layaways
During Layaway Release:
- Verify the customer's identity before releasing items
- Check that the layaway is fully paid before release
- Inspect items for damage before completing the sale
- Process the final sale transaction completely

Troubleshooting Common Issues
Problem: Can't create a layaway for a customer
Solution: Check if the customer has a "No layaways" flag or if you need override permissions
Problem: Can't find an existing layaway
Solution: Use the browse function in Process Layaways dialog to search by customer name or layaway number
Problem: Inventory shows as unavailable but items are on layaway
Solution: This is normal - layaway items reduce available inventory until released or cancelled
Summary
Layaways in NCR Voyix Counterpoint provide a powerful way to serve customers who need flexible payment options while maintaining accurate inventory control. By mastering these features, you can:
- Increase sales by accommodating customers who can't pay in full immediately
- Maintain accurate inventory tracking with reserved quantities
- Provide excellent customer service through flexible payment processing
- Keep detailed records for business analysis and customer service
Remember: Layaway processing uses the same interface as regular sales, so once you understand the basic concepts, the actual operations will feel familiar and intuitive.


Share On: